I was fairly exhausted when the lesson ended as I did circuit revision right before Lesson 3. Can't imagine how tiring it was when I was doing Class 2B.
Booked TP test immediately. The earliest slot being 2 freaking months away... sigh...
Notes:
Shahr33n: The SG Daddy Blogger |
|
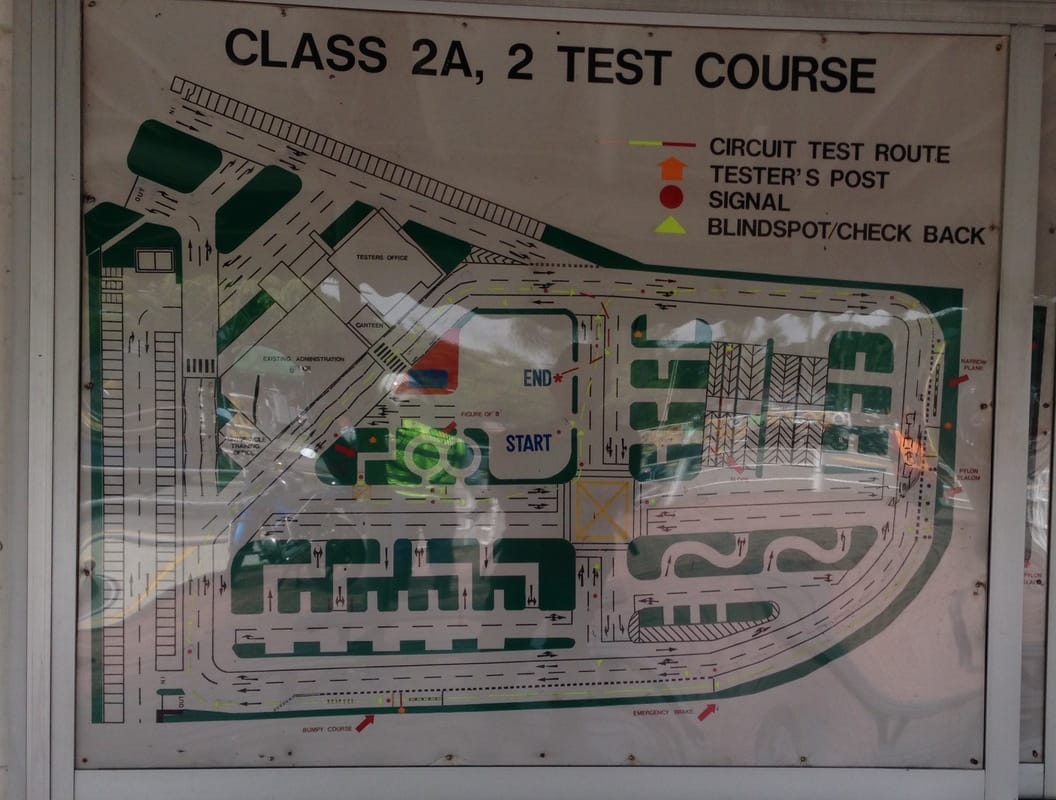
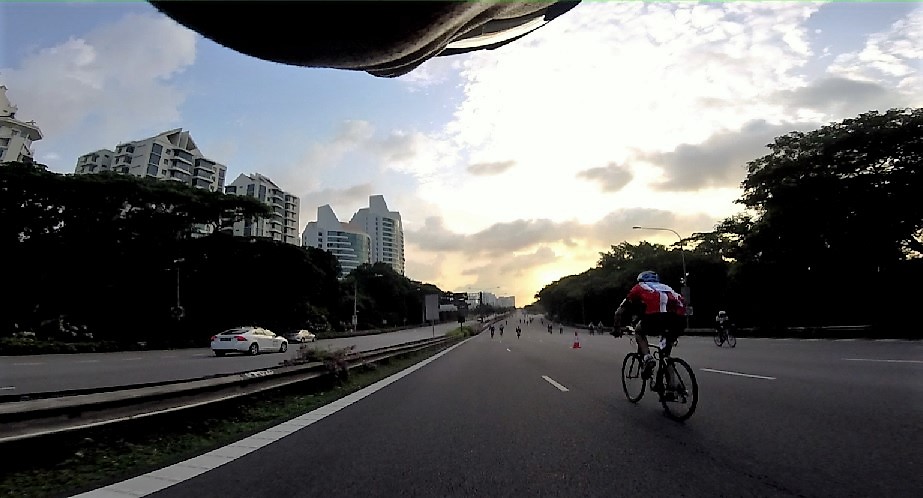
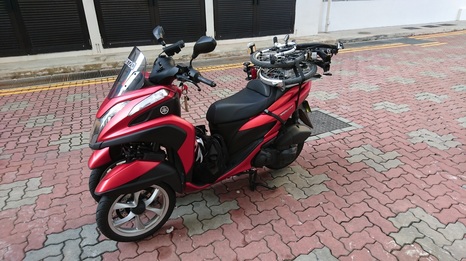
Cleared Lesson 3 with just 4 demerit points (max 16 points to fail). The 4 points came from being a wee bit fast on the bumpy course (5.83 sec instead of minimum 6 sec... sheesh). I guess they needed to give me some points...
I was fairly exhausted when the lesson ended as I did circuit revision right before Lesson 3. Can't imagine how tiring it was when I was doing Class 2B. Booked TP test immediately. The earliest slot being 2 freaking months away... sigh... Notes:
0 Comments
CRANK COURSE
I was really bad at handling the bike at the crank course. I wasn't allowed to stay in first gear and do half clutch, so at low speed (2nd gear), the bike was very juttery (almost stalling). Every time the bike was about to stall, I applied a bit of trottle and the bike would lurch... thus, it's best to apply a steady trottle at 2nd gear and apply rear brakes when necessary. Oh, check back right and left before moving off. At the end of the crank course, best to stop if there are on-coming traffic. EMERGENCY BRAKING The emergency braking is pretty much the same as Class 2B except that you need to hit 40km/hr and stop between the yellow and red line. Make sure you look straight as looking down may cause you to get demerit points. Before moving off, check back right, right foot down, step down to first gear, right foot back up, signal right and get ready for Bumpy Course. BUMPY COURSE Turn off signal indicator immediately after moving off. Stay in 1st gear, and maintain half clutch before standing up and leaning forward. Go as slow as you can by playing with your half clutch and rear brake. For the first few attempts, the instructor was yelling at me for not standing high enough. Later he told me that I must really stand up and true enough, it was much easier to control the bike when standing upright as opposed to "half-standing". We were made to do as many attempts as possible until 10am. Overall, I didn't do so bad and passed Lesson 2. I've booked Lesson 3 and Circuit Revision on 27 Dec (back-to-back). For those who aren't aware, you can book lessons back-to-back so as to make good use of your travel time to CDC. For instance, I booked my Circuit Revision from 8.30-10am slot and then Lesson 3 from 10.20 to 12noon slot. By doing Circuit Revision immediately before the next lesson, you would have familiarise yourself with the bike and be more confident during the lesson. It's already one year (plus 4 days) since I got my Class 2B and this morning, I was back at Comfortdelgro CDC to take my 1st Class 2A lesson! It was nice to be in a familiar environment. Feels nostalgic to see riders learning Class 2B and falling...
Sigh... already the first thing that I forgot to bring for the lesson is my new booklet... thankfully, they let me take the lesson but I must not lose my receipt if I pass the lesson. Thanks to a blogger's advice, I kept all my knee and elbow guards. No problem re-using :D The rest of the registration steps are similar to Class 2B so I won't write about it. My instructor for the lesson was Mr Edwin. Charming fellow, asking me questions again and again... anyway, my head was spinning by the time he went through the briefing... so much to remember (lane formation, checking blind spots, etc)... I will cover a bit more about the test route and things to look out for in subsequent posts. The bike, a Honda CB 250 was smaller than the Bajaj Pulsar 200 NS so the Honda hardly gave me any problems. I was more concerned with not screwing up the checks and sequences... note for Class 2B/2A learners, use the centre stand when parking the bike. Only Class 2 bikes can use side stand... Fortunately after 1 hour of riding, I became more confident as my muscle memory of riding over 50 hours during class 2B gradually came back. Here's a quick run-down: Station 1: Slope (steeper than 2B) Station 2: Plank (minimum 8 secs) Station 3: Slalom (minimum 6 secs) Results: PASSED first time :D You'll be given 3 attempts for each station. I overheard from the instructor who was briefing the failures that learners need to pass 2 out of 3 attempts to clear the station. You may struggle if you have been riding an auto transmission bike (e.g. scooters) or didn't ride at all for over a year since passing 2B. Lesson 2 will be this Sunday morning. Will cover the Figure-8, e-brake and bumpy course. Stay tuned! Afternote: To reward myself, I went over to Racing World and got myself a new pair of gloves - Alpinestars GP Air. My A* Scheme gloves is rather worned out and wanted one with palm/wrist slider/protection. As some of you may have read, I'm a strong advocate for wearing safety riding gear (even though I'm riding a 'slow' 125cc three-wheeler). Other motorists can still hit you or you were not giving 100% attention while riding or make one tiny mistake. The consequence can range from minor to devastating if you go down with minimal riding gear. And do yourself a favour by getting an integrated health plan (preferably allowing you to get treated at a Private hospital or at least a B1 if your budget is limited). Medishield Life simply doesn't cut it for non-life threatening injuries (no matter how much pain you're in). You should not cut corners with your life especially when riders cannot give 100% guarantee that they won't meet with an accident. By being prepared, you can enjoy your ride with a peace of mind and if luck is not on your side, hopefully, you can walk away and be able to ride (or live) another day :D With 3 small kids and a burgeoning list of hobbies, it was a matter of time before I ran out of storage space at my 4-room flat. Frankly, I could throw away things that I no longer need but I'm a bit of hoarder so I figured that I transfer some of the unused stuff offsite for a few months and then bring back only those that I need. This also gives me an opportunity to repaint the living room. I went scouting for a storage solution provider and lock+store along Serangoon North Ave 4 was the nearest to my home. There are several sizes to choose (12sq ft, 24, 48, 65, 97, 145, 194). Unfortunately, they ran out of 24 square feet room which is the size of a HDB lift. They offered a 48 sq ft room which costs $225 per month (after discount) but I don't need such a big room. I googled on my phone for another nearby service provider and headed over to Extra Space Asia Singapore at Ang Mo Kio Industrial Park 2. After confirming that they have a 24 sq ft storage room, the sales exec gave me a tour of its facility. I thought their smallest storage solution of 12 sq ft (lockers) was rather small when looking on my phone but it was suprisingly large in person. There are two lockers per column, the lower costing more as you don't have to lift your stuff to put it inside. I wanted a locker but they only have the 2nd level lockers and I didn't want to break my back to carry my stuff up so I stuck to the 24 sq ft storeroom which cost about $120 per month. I was given a 6 pin code for entry/exit. The facility is open 24/7 so you can go there anytime you like. You would need to get your own lock for the storage door. I also had to buy my own boxes. You can buy the boxes from them for a reasonable price. Here are some photos of me storing my stuff after signing a 6-month contract: Best of all, when I signed the contract on 28 Nov, they had just started this Christmas Lucky Draw prizes and a week later, they called me up to inform that I actually won the first prize, which was a new iPhone 7 (128gb) worth $1080. I'm super blessed! Guess you know what I'll do with it :D
So did I give a positive review just because I won an expensive prize? Haha... no... I'd say that the prize is just a bonus for me and I'm thankful for winning it! Overall, the experience was a pleasant and hassle free. I may downgrade to the locker size room which is about $80/mth after I have met the minimum 3-month contract duration. There are probably cheaper storage providers around but the location may not be ideal. It's only a 10 minutes drive from my home to the facility. So shop around and ask for quotes. Hope you don't have to spend $ to get extra storage space. I have 3 beautiful children. Today, I shall talk about my first child (son) who recently turned 5.
At the age of 3, he was diagnosed with autism. Autism is "a mental condition, present from early childhood, characterized by great difficulty in communicating and forming relationships with other people and in using language and abstract concepts". I had noticed the symptoms when he was 2 and pushed for him to be checked as soon as possible. Hearing the official confirmation from the specialist that he has autism was a sad day for my wife and I. We were not sadden for having a special need child but worry over the kind of life he would lead. Will he make friends? Will he have a decent job? Will he meet the girl of his dream? Will he have his own kids? Will he... The journey of providing him the proper support began from day 1. It also involved my wife quitting her job shortly after getting her degree at SIM so she can give him full attention. I must admit that my wife has made a lot of sacrifices so the least I can do is provide my family by giving nothing less but my best in whatever I do. Financially, we are doing alright so that's one less thing to worry about. Fortunately, my son's autism is on the milder side but we don't think he could go to a mainstream school. For the next few months, we will try to get him into Pathlight School which has a long waiting list. We do think that his siblings would play a significant role in bringing out the best in him. While I don't like talking about my personal matters, especially something this sensitive, several recent experiences have prompted me to speak up for families with special need children. Indeed, we tend to take such things for granted until one has to go through it. In case you are one of them, rest assured that you're not alone. Hence, I will do what I can to raise awareness on autism by sharing our experiences. Ultimate, we don't need anyone's sympathy. We just want children with special needs to get equal opportunity in life... #lovechildren #lovelife Went to KL over the weekend with my family and in-laws to complete my OCBC Cycle 2016 "Double" - again, using my Brompton for ease of transportation (or the lack of it). LOGISTICS Before I talk about the cycling event, let me touch on the challenges of travelling in a car on a 4-hour drive with 4 adults and 3 small kids. Due to space constraint, we couldn't bring too much stuff along (or shop a lot). Navigating was surprisingly easy around KL, thanks to Google Map (Offline). We stayed at Miramar Hotel (2-star) for S$100 per night (includes free breakfast). The family room that we got was quite large though the single toilet was a bit of a bummer. But the kids liked the extra space so it was all good. I won't recommend staying there if you don't have your own transport. When driving around Malaysia, get a Touch N Go card with at least RM200 to pay for highway tolls and parking (especially at shopping malls). OCBC Cycle KL 2016 - Pre-Race (Saturday) The OCBC Cycle KL was held at Dataran Merdeka, which was just 10 minutes bicycle ride from the hotel. I found that KL is not bicycle friendly (or even wheelchair friendly). While the road quality is ok, safety isn't as the drivers are just too aggressive. The pedestrian pavements at many areas are really in poor condition. They really need to improve their maintenance regime. What's the point of having fancy infrastructures that are not working... Back to the event, I collected my race pack on a Saturday morning. No queue but the collection area was underwhelming when compared to the Singapore version. No support/participation from local bicycle shops so I couldn't spend my Malaysian Ringgit... I just came, collect and went back to the hotel in just under an hour. Race Day Woke up very early as all cyclists have to report at the starting point by 6am. This was the 2nd time OCBC Cycle was held in KL so the number of participants was rather low at around 1300 riders. I'm riding a Brompton so I am under the Foldable Bike category (the other two being Road and Mountain Bike). There were prizes to be won for the top 3 riders. The route for this year's edition saw us covering 40km (3 laps of 13 km/lap). There were 2 long ascents to conquer but the rest of the route was fairly flat. I didn't race that hard as I was not familiar with the route, especially the downhill sections. I finished at 1 hr 35 mins, coming in 20th out 133 riders in the foldable bike category. Not bad for a first timer. Would I go again next year? Probably not. I don't like riding laps around the same route. I did enjoy the uphill challenge and hope the coming Tour de Bintan would provide me more of that! Today I bid farewell to my first bike which I bought new in Dec 2015. Unlike the Honda CBR, the Pulsar served me well. It's steady to ride and has more than enough power for Singapore roads. Yesterday at around 10am, I met up with the new owner, Sherman at LTA (Sin Ming) to do the vehicle transfer. Surprisingly, it only took 15 minutes to get the paperwork done. The officer who attended to us said that it gets very crowded in the afternoon, on Saturdays, and right after COE bidding so take note! Spent the evening washing the bike and sprayed a fresh coat of lube on the chain. Can pass off as a new bike (and still under warranty until December)! I advised Sherman to go riding with me around Seletar airport to get a feel of riding the bike. It was like a farewell ride and I'm sad to let it go. Hope the Pulsar would serve Sherman just as well as it had served me! Ride safe bro! Coming soon, Class 2A :D The OCBC Cycle 2016 was my first participation in a cycling event and it went great! I even got a video grab of me riding from the flag off!!! I arrived fairly early at 6am and was glad to get near the front of about 300 riders. Once the ride started at 7am, it was simply getting passed the slower riders and picking up the pace along the first stretch of Nicoll Highway. I was going at max FTP (32km/hr) on the Brompton upon reaching the F1 pitlane. All that training had paid off as I clocked better than my target time, at 54 minutes for the 23km Straits Time Ride. According to Strava, I was ranked 9th out of 108 riders. Not bad for someone on a foldable bike! I even "flew" down Benjamin Sheare's Bridge at a breakneck speed of 56km/hr! Was kinda dangerous when I looked at the video... The route was was quite interesting but it could do with a lot less sharp u-turns... I've always wanted to ride my bike on the expressway and it was a pity that ECP section was rather short (had to turn back near Big Splash)... oh well... overall, the event was well organised and I also spent quite a lot at the Expo, picking up a new front light (Moon Comet-X) and stocking up on energy drink and bars for the next few weeks of training.
Can't wait for my first overseas cycling event in KL next month which will be even tougher! Final Training Session for OCBC Cycle (SG) The OCBC Cycle (Singapore) is this weekend. My preparation for the event started in late July and I rode my last round of training session this evening with another 28km ride. I felt good overall. The only issue now is which bike should I ride this Sunday... my Brompton (aka Brommie) has been a joy to ride and despite posting my personal bests this week, I know I can go even faster on my Trek road bike which can be 30% faster than Brommie... I've already signed up for OCBC Cycle (KL) in November and I will definitely ride Brommie as it's easier to transport in a car. Hmm... I may just go on Brommie this Sunday as I don't really want to ride so hard for my first sportive even though I can now ride 180watts/hr... will decide soon. In the meantime, I've been upgrading Brommie to suit my riding style. Below is a list of upgrades that I've made in no particular order of when I purchased the items: Upgrade #1 (Brompton Firm Suspension) - Mini Review When I first got Brommie, the standard suspension was simply too bouncy for me especially when I ride hard. I'm 77kg and I read that a Firm suspension would lessen the bouncing on poor road conditions. So I went down to Mighty Velo to get the Brompton firm suspension block for S$20. Installation was simple. Just remove the nut (just below the FIRM text), remove the Standard suspension block, then fixed the Firm one in the same way. You would need a 10mm spanner/wrench to unscrew the nut though. I tested the new suspension using the same route and effort. Found the ride to be better especially when I went into Time Trial position (on a Brompton??? yes you can!). Still some bouncing if I ride hard e.g. cadence >80 rpm at 5th gear. Alternative, you could get the 3rd party Jenny Suspension for $85 for even firmer ride... anyway, I'm ok with what I got. B+ score for the purchase. Upgrade #2 - Ergon GP1 Handlebar Grips - Mini Review I didn't like the original sponge-like grips that came with the Brompton... They were just too small for my hands which ached when I did the 75km ride earlier this month. So I got the Ergon Grips GP1 from Mighty Velo for S$65 (don't buy there as you can get it for S$51 at BRU-Yishun...In fact, don't buy non-Brompton stuff at Mighty Velo... overpriced!!!). Installation was a challenge as the M-type handlebars is not long enough to fit the grips... so I had to use my mini-saw to cut the excess. I made the mistake of over-cutting by 0.5cm but it's no big deal. Can still adjust the brakes to close up the gap (which you can see in the photo). You won't need to cut for S-type handlebars. To remove the original sponge grips, just use a penknife and slice it down. The Ergon grips worked wonders. The wider area at the palm is fantastic. In fact, I can now lower my back and rest my forearms on the grips/handlebars just like in a Time Trial position. It really helps reduce wind drag and I can go about 15% faster with the same effort. This would be quite hard to do on the sponge grips as the Brompton has a twitchy handling due to the 16 inch wheels. Overall, an A+ purchase. (just don't buy from Might Velo if you can help it...) Upgrade #3 - Brooks B17 Saddle (Select) - Mini Review The original Brompton saddle wasn't all that bad but I kept reading how wonderful Brooks leather saddles are for long rides on the Brompton and was tempted to give it a try... I got the saddle from Mighty Velo for S$192.50 and was a bit sceptical at first as the feel of the leather felt like wood (knock-knock kind of wood sound). I was told that it would take about 300km to "break-in" the leather and I felt that it's somewhat true as I'm about to reach that magic figure. I did suffer a bit during my first long ride - two days after getting the saddle. Tonight, it felt strangely comfortable when I rode on it... I'm sure it would get better over time and my bottom would love me for getting the Brooks :) Installing the saddle was a bit tricky at first due to the hard leather flap blocking access to the nut and bolt. Just gently pull the leather and use a short-sided allen key to tighten it. Don't worry, the leather is really tough. A B-grade purchase for now... Brompton Mini-O Bag & Beto Waterbottle Cage I've been going back and forth about buying the Brompton Mini-O bag because of the S$200 price-tag. Mighty Velo was selling it at 20% discount for the older version in August but I missed that promotion. I though of waiting for another sale or try my luck getting 2nd hand via Togoparts. I realised that waiting isn't my strong trait so I bit the bullet(wallet) and got the bag earlier today. It's really a good-size bag for short or day-long rides. It allows me to simply stash my essentials without the need to carry a bag or waist pouch which would have been rather uncomfortable. Quality-wise is good, being waterproof and reflective but I was a bit wary after the shop assistant told me to be careful when opening the top. He advised me that I opened it by pulling the two nylon tabs instead of peeling the copper buttons which could come off entirely... pfft... so much for durability... Once opened, you'll find a small zipper pocket and a dongle to clip your keys. The bag also came with a shoulder sling which I doubt I would use that often due to the large/hard clip-on area on the other side of the bag. Anyway, it's good to have one just in case I need to carry around. Now that I'm using the mini-O instead of the T-bag, I will no longer have an external pocket to hold my water bottle. I could have bought the Monkii waterbottle cage for S$23 from Mighty Velo but read that it takes some force to unclip in order to remove the bottle. This is a no-no for me as I drink while on the move. Fortunately, Jet Cycle or Jet Hobby, my favourite place to buy affordable bike accessories have a much cheaper (S$8.90) and better option. Beto Bottle Cage is a vice-like clamp waterbottle cage which doesn't require any screws. You can see in the earlier photos of how the cage is clamped. I've already tested it and it's very easy to just pull out the water bottle for a quick sip. Bought two - one placed on the stem and the other on the seat post (if I'm doing >50km rides).
Overall, a B+ purchase for the bag and A for the water-bottle cage Afternote: should tape up the stem to protect the paint from being scratched by the screw) 44T Chainring Brommie came with a 50T chainring which is ok for gentle hills and flats. However, it was simply not sufficient at the lowest gear when I was riding up Benjamin Sheares Bridge. So I got a 44T (-12%) from Mighty Velo for S$85 (again pricey) and did an easy installation to replace the 50T. Thus far, the low gearing is marginally better and I will use the 5th gear more often at speeds of 28km/hr at 80 rpm cadence. Can go >30km/hr at ger 6th but I'm not that fit yet... Previously on a 50T, I only used gears 1 to 4. A 39T chainring would have been cool but I might end up being too slow on flats. *Shrugs* B+ purchase. Having rediscovered my interest in cycling in July 2016, I've started putting serious mileage on my 4-year old Trek road bike. Sadly, riding a road bike feels unsafe on our Singapore roads. While it can move relative fast at +30km/hr, it's not fast enough to keep up with traffic. Hence I would ride the Trek on low traffic areas such as Seletar Airport or the surrounding Park Connectors. I signed up for the OCBC Cycle in October so I needed to level up my fitness quickly. Riding on my road bike for short distances (i.e. less than 20km) can be a chore as you need to look the part when riding on a road bike (like wearing cycling jersey, helmet, gloves, cycling shoes...). So I turned to virtual cycling portal, Zwift. It's been great experience as hooking up the Trek on a smart trainer allows me to cycle on somewhat real-life conditions. Buuuuut, you can't improve by just riding at home and I really wanted to ride long distance outdoors. After a short search online, I got myself a used 1-year old 6-speed Brompton via Togoparts.sg for $1900. While I don't plan on bringing this bike on public transport, the abilty to fold up is a nice option. You can see the photo below of how I strapped the Brompton on my Yamaha Tricity with a pair of Rokr straps. I gave my used Brompton a full servicing after getting it from its previous owner. Also swapped the original saddle to a Brooks B17. After struggling to climb Benjamin Sheare's bridge on the default 50T chainring, I bought a smaller 44T, giving me -12% ratio at the lowest gear. Planned to change the grips to an Ergon GP1. Here's a couple of pic of my Brommie: So how does it feel like riding on a foldable bike? Well, this is not my first foldable bike. My 2008 Dahon Speed D7 is my first which currently resides at my workplace as an exercise bike. In terms of speed, given the same effort of riding, the Trek is naturally the fastest (averaging 25km/hr), followed by the 20" wheels of the Dahon (20km/hr) and then the 16" wheels Brompton (18km/hr). I recently did my longest ride on a bicycle yesterday for a total distance of 75km (4hr 30min). I rode 90% on Park Connectors which was mostly a pleasant experience. There were some constructions going on which required some detour. Note to cyclists who are crossing over from Pasir Ris to Punggol, the Lorong Halus track is undergoing renovation works so have to take a long detour via main roads in order to reach the pedestrian-only bridge. My Brooks saddle hasn't broken in yet so my butt started to ache at the 40km mark. By 50km, I started to "bonk" due to lack of carbo and electrolytes (burned 2400 calories on this ride).I was almost in tears for the last 10km... but it felt great when I reached home... Need to have a better fuelling strategy or go at a slower pace for my next long ride.
Overall, the Brompton is a great bike. I feel like riding a well-built vintage car. It is slow and heavy at 13kg but that's what it is supposed to be. To enjoy the surroundings and take life easy. If I want to go fast, there's always the Trek. But we don't live in picturesque mountains of the French alps, so I don't feel motivated to ride long distance on the Trek. I really like the front block which allows me to fix a bag carrier. Once I can cycle 100km in 5 hours without bonking, I might consider touring on the Brompton. |
About MeJust your typical guy in his 40s, married to a lovely wife + three kids, living a life in tiny Singapore. Categories
All
Class 2B Summary
Circuit Orientation: 1 Lesson 1: 2 Lesson 2: 1 Lesson 3: 1 Lesson 4: 1 Lesson 5: 3 Lesson 6: 2 Lesson 7: 1 Lesson 8: 1 Circuit Revision: 8 Road Revision: 4 Basic Theory: N/A Riding Theory: 4/4 Defence Riding Theory: 3/3 Internal Evaluation: 1 Riding Theory Test: 1/1 Final Practical Test: 1/1 Amount Spent $140+$300+200+200+150 Class 2A Summary Lesson 1: 1/1 Lesson 2: 1/1 Lesson 3: 1/1 Riding Theory: 1/1 Circuit Revision: 2 Final Practical Test: 1/1 Amount Spent $330 Class 2 Summary Lesson 1: 1/1 Lesson 2: 1/1 Lesson 3: 1/1 Circuit Revision 2/2 No show: 2/2 Final Practical Test: 1/1 Amount Spent $400 Total [2B+2A+2]: $1720 Archives
April 2023
|